Friday, October 31, 2014

Margo Handbag - Step 5

Step five is to prepare and cut out the contrast fabric.

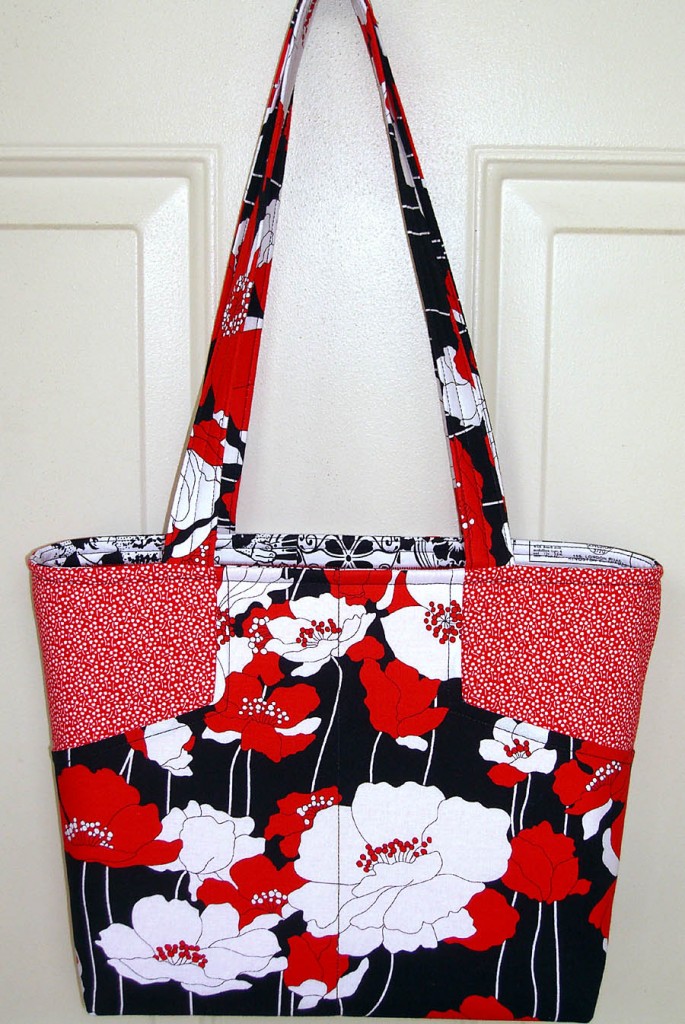
The Margo Handbag pattern is designed to use four coordinating fabrics.  I found two fabrics that I like together, and I "don't wants no more."

Besides, when I bought my last two purses, I was told they were made with light-toned interior fabric so the contents could be readily seen, like this:

Here is the main fabric:

Here is the contrast fabric:

First, I steam pressed the contrast fabric and laid it out on the table:

After cutting one end of the fabric straight, I placed pattern pieces on the fabric to check the layout.  Here are the pieces for the front and back, front and back pockets, and insert sleeve:

The length of the big pieces is 15 inches, The small pieces are 4-3/4" by 11-1/2 inches.

I started by cutting across the fabric at the 12-inch mark for the front and back pieces.  Then I cut across the fabric at the 24-inch mark for the front and back pocket lining pieces.

Tip:

Here is how I ensure that the ruler will be laid straight before I use it.  I go to the end of the fabric that's not near the numbers showing inches on the cutting mat.  I measure from the zero line and place something on the table to point to the correct measurement.  This picture shows that I put a bottle cap at the 24-inch mark:

The 24-inch mark is closer to the left side of the cutting table.  I want to cut from that side, so the edge of the ruler used with the rotary cutter is on the right side.  I stand at the end of the table by the numbers, I place the far end of the cutting edge of the ruler on the same line as the bottle cap.  Then I lay the ruler down with the near end of the cutting edge at the number 24:

Back to our regular program:

I cut off the selvage, made two cross cuts 15 inches apart, and made one more cross cut 11-1/2 inches away.  The last piece I cut into two strips 4-3/4" wide:

I cut the lining and inside pocket pieces in a similar fashion.  The lining pieces are 17 inches by 14 inches, and the inside pocket pieces are 17 inches by 10 inches.

The long cuts are 14 inches from the right side, then 10 inches from the first cut.  The cross cuts are 17 inches apart:

All the fabric pieces are paired with their pattern pieces, and are off the table.

The next step is to make the front and back pockets, and maybe more.

Margo Handbag - Step 4

Step four is to cut out the underpinnings.

This post is not showing you how I use the pattern pieces to plan where to cut, as I did in the previous step - here.

First, I cut two strips of woven interfacing for the straps:

Then I cut two pieces of woven interfacing for the lining:

After returning the interfacing fabrics to their rightful home, I cut two strips of batting for the handles:

I cut two pieces of Stiff Stuff (a Lazy Girl product - here), to strengthen the body of the purse:

Now the table has been cleared and I'm ready for the next step, which is to prepare and cut out the contrasting fabric.

Thursday, October 30, 2014

Margo Handbag - Step 3

I last stated that step three is to prepare the fabric.  Well, that got changed a bit.

I finished making pattern pieces by making a template for the back pocket.  I used the front pocket template's angle as the angle for the back pocket, which will dip down in the middle.  Here is the back pocket template before trimming to half the width of the pocket piece:

Here is the final back pocket template.  The corner mark will actually go in the upper corner, in the same way the front pocket template is used:

Step three is to prepare and cut out the main fabric.

First, I pressed the fabric on the wrong side, up one side  then down the other:

Then I laid it out on the table so you can see how much there is and what it looks like:


I played with the pattern pieces to see how I wanted to cut it out.  I started by placing the strap pieces lengthwise, since I thought that would make the straps stronger:

That would chop up the fabric a bit, so I decided to lay the straps out crosswise:

I removed the pattern pieces and folded the fabric to one side of the table:

I pulled the fabric across the table until the cut end crossed over the zero line.  I also made sure the selvages were parallel to the grid:

I used my heavy, aluminum Shopsmith ruler and my rotary cutter to cut across the zero line:

I used the pattern pieces to remind me where to cut.  I saw that it would be 12 inches:

I removed the pattern pieces and cut 12 inches, all the way across the fabric:

I used the next pattern piece to see how far to cut:

... and again:

I put away the remaining fabric, and moved the smaller pieces out of the way.  I found the center of the pattern piece so I could place the fabric designs in a pleasing manner.  I decided to place the blue flower at the center top of the front:

For this piece, I cut at the 4-inch mark and the 19-inch mark:

Here are the pocket panels after cutting:

I put the pattern pieces on top of the fabric, and set them aside.  I used the handle pattern pieces to see how long to cut the handles:

The main fabric pieces have been set aside:

I only used "this much" fabric!

I am using only two fabrics for this purse, and I have so much of the second fabric that I will save that for last.

The next step is to cut out the supporting documents pieces, er, Margo's underpinnings!

Wednesday, October 29, 2014

Margo Handbag - Step 2

Step Two is to make the pattern pieces.

I've been questioned about making pattern pieces for a rotary cutter project.  I like to lay out the pieces to see how they will fit on the fabric before I cut them.  I did this with the Runaround Bag project:

This purse is much bigger, so I taped legal-size sheets of paper together for most of the pattern pieces:

Of course, then I had to cut the pieces to size.  Having a quilting ruler and rotary cutter was a great help:

Here is the stack of pattern pieces, complete with list.  I crossed out each pattern piece on the list as I made it:

The next step is to prepare the fabric.  The fabrics for this purse have already gone through the washer and dryer three times - because they are 100% cotton.  What I really have to do is steam press the fabrics into smooth submission so the final pieces do not get distorted when I cut them out.

Margo Handbag - Step 1

Here's my old purse, fraying at the edges.  DH threatened to buy me a new purse if I didn't hurry up and get started on this project - which uses the same fabric, found at Joann's:


So, I have actually started my purse project.  It is the Margo Handbag from Lazy Girl Designs - here.


This purse is designed with no pocket on the back, but mine will have pockets both front and back.

Step one is planning.  In order to add a pocket to the back, I have to add the pocket parts to the back.  So, in addition to having a front, a back, and two pocket layers for the front, I also have to have two pocket layers for the back.

I've also decided to mix it up by using Stiff Stuff, instead of fleece, for the front and back of the purse.  This is what the instruction booklet layout calls Covers (later called Front and Back).

Here's my list:

The next step is to make the pattern pieces.

Sunday, October 26, 2014

I Still did not Buy Fabric

Yep.

-- but, my husband did ...

So, anyway, this is a knit lace with a print that will work quite nicely as a shrug for most of my dresses.  I will probably use the pattern I've used before - here and here  - or I might use a different pattern.

I know, for a fabric fast, this is what is called cheating ...

Meanwhile, I finished the pillowcases - fabric featured here .  There are three regular pillowcases and two to fit a 15-inch square pillow:

My next project will be the Margo Handbag from Lazy Girl Designs - here.

This purse is designed with no pocket on the back, but I plan to modify the back to have pockets.

I plan to start by making actual pattern pieces, as I did for the Runaround Bag - here.  I will try to remember to take pictures of the process.

Thursday, October 2, 2014

I Did not Buy Fabric

That's correct.

I did not buy fabric.

Do not let the 2.5-yard, 60-inches wide, sale-priced, micro-fiber fleece fool you.

It's not just any fabric.

It's a blanket.

In my updated guest room.

See?